


Description
This product is intended for military-historical reenactment (immersive stydy of history); for creating costumes for theatrical and film, video plays condemning Nazism and fascism; as well as for exhibiting in museums of military history. This product is not propaganda of ideas and criminals convicted by an International Military Tribunal, and should not be used for such a purpose! The photos have been edited in accordance with the requirements of the law.
The price is for 1 (one) shield, not for a pair (not for a set). The buyer collects the kit independently, buying the necessary number of shields. To get the kit, you need to buy another shield: the Wehrmacht tricolor decal (most often with a round bottom).
To see additional photos please follow the link.
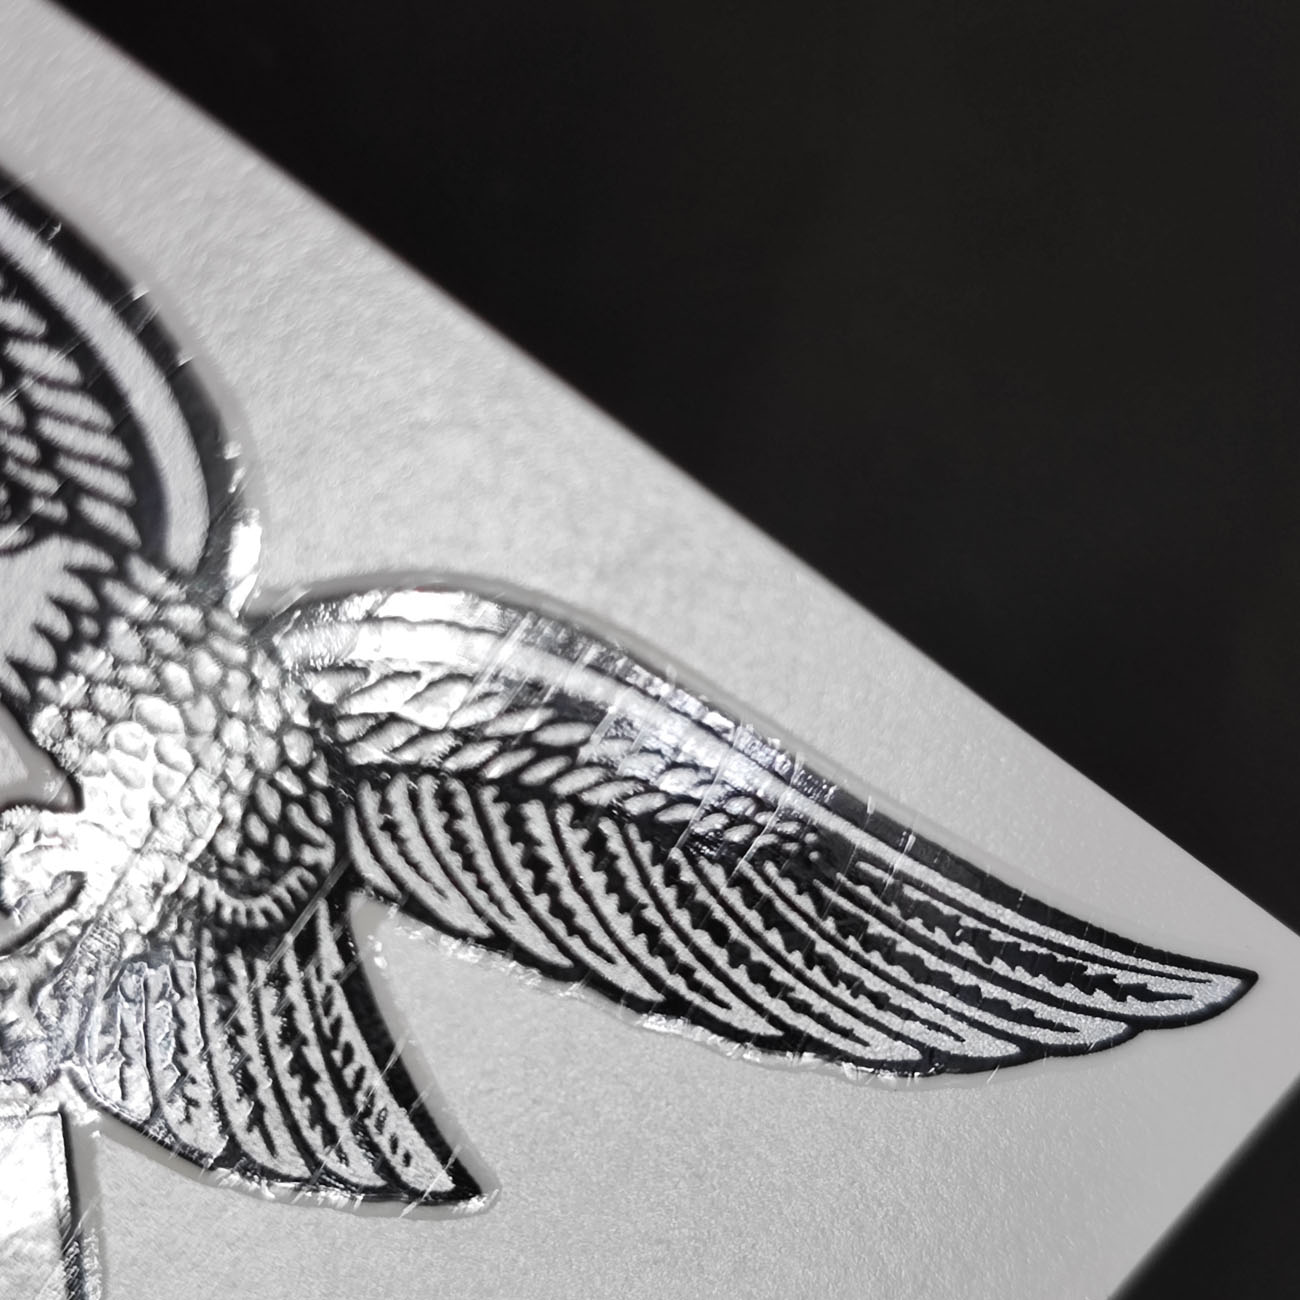
We offer high-quality copies of original designs produced exclusively for our store. Our decals are an independent development. Decals have the accurate proportions and good detailing. Decals were printed on a professional equipment.
We offer the following eagle options:
- White - white eagle on a black background.
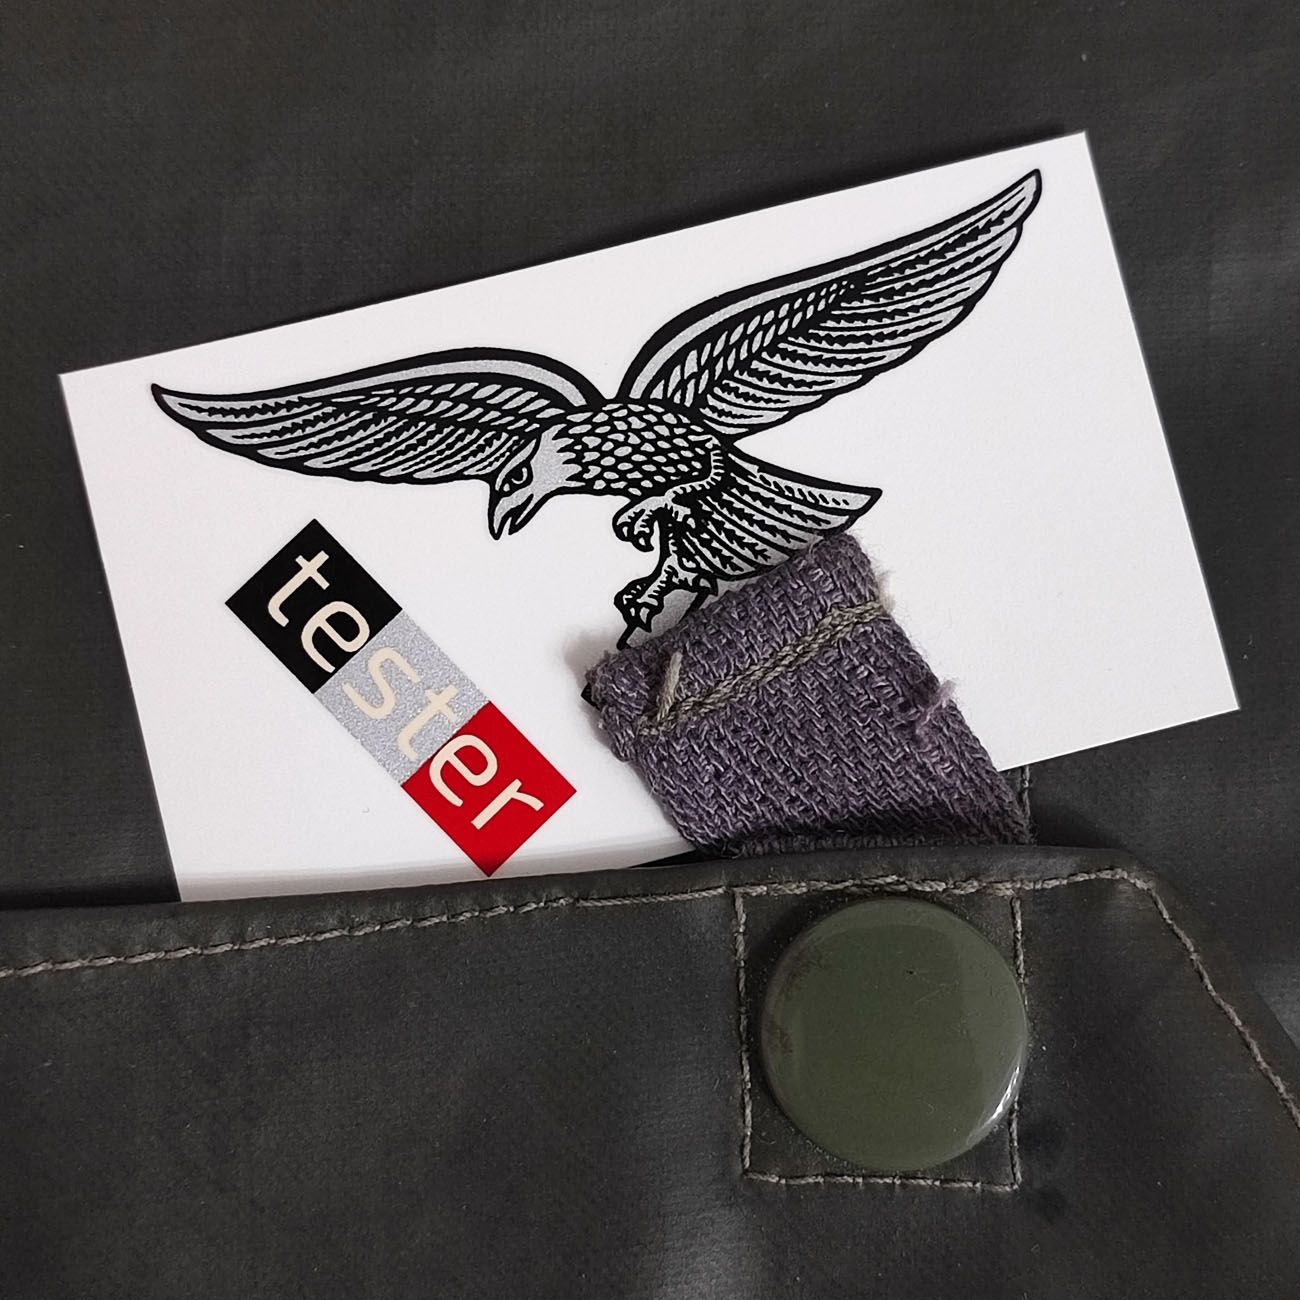
- Silver - classic silver eagle on a black background.
In the photo below you can compare both options.
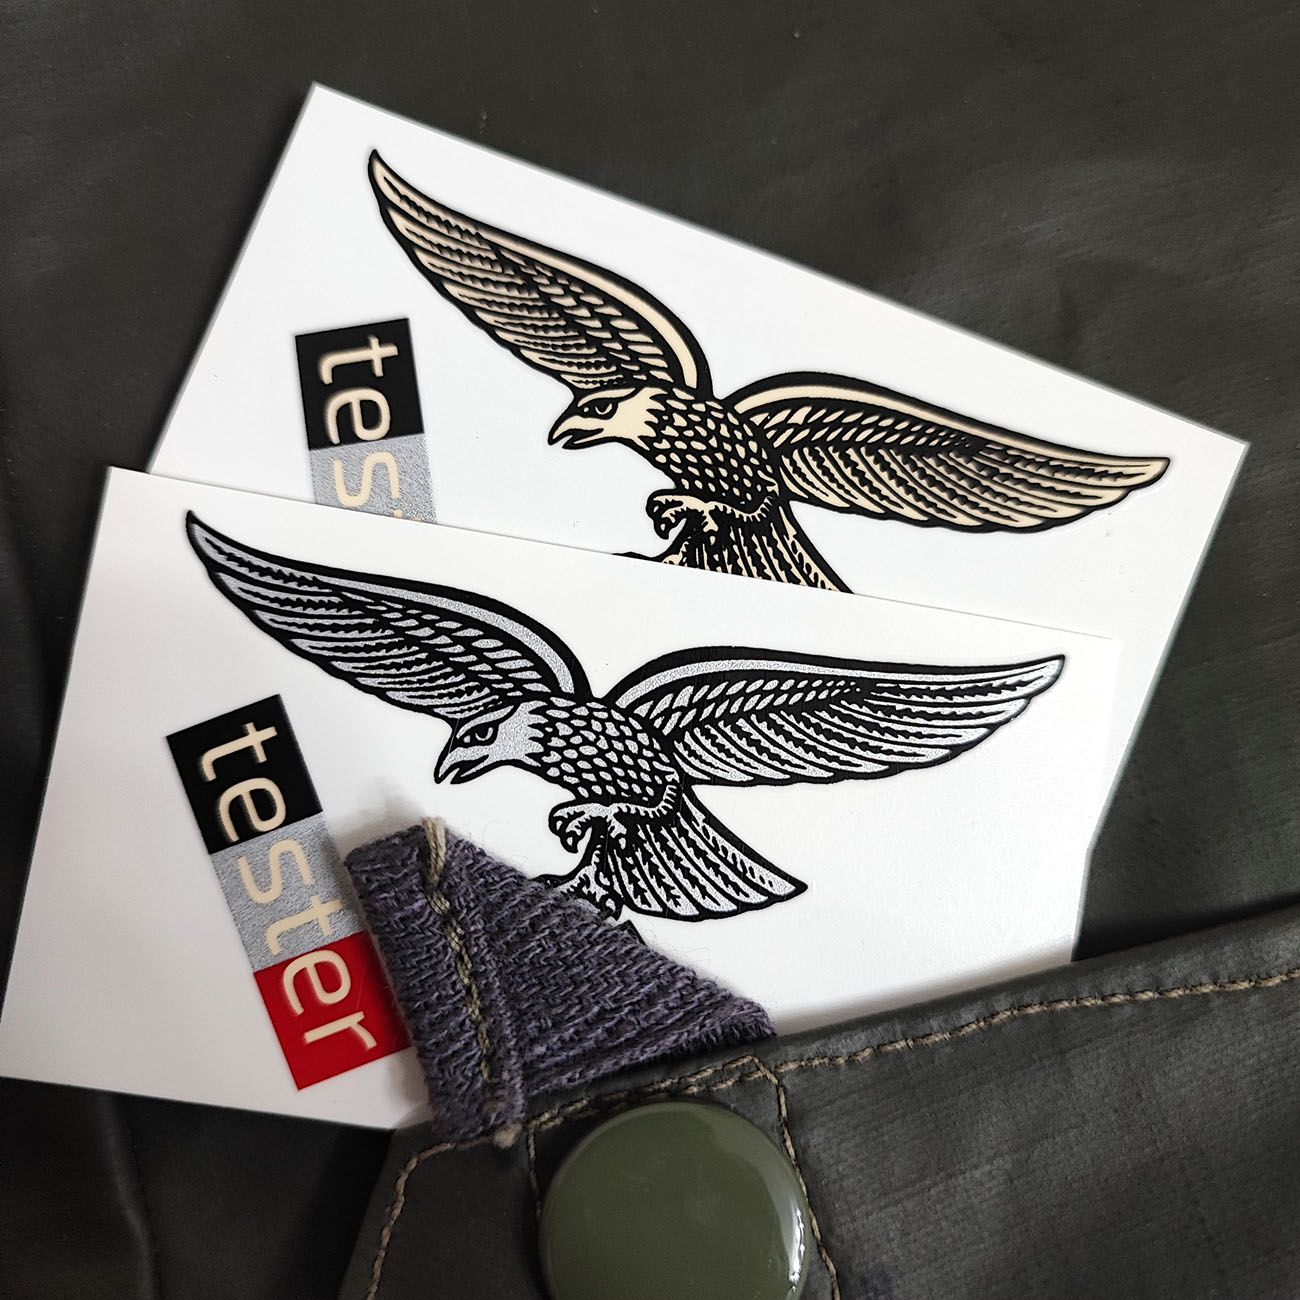
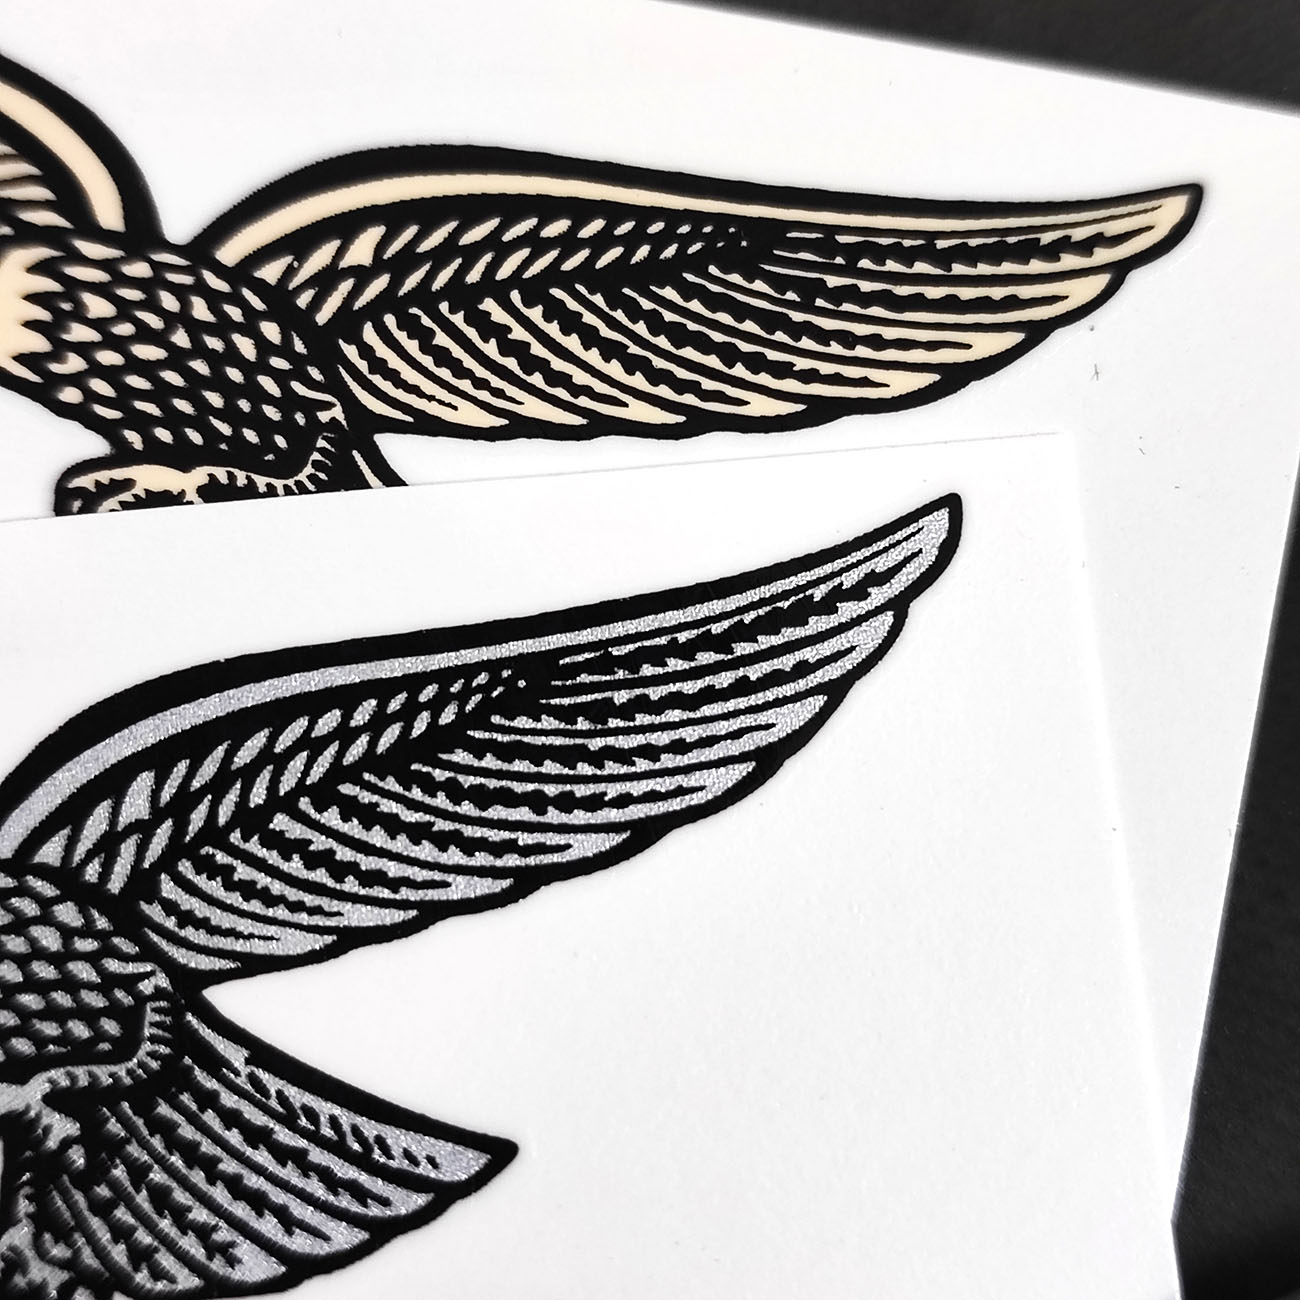
Photo for comparison of decal options: white and silver eagle.
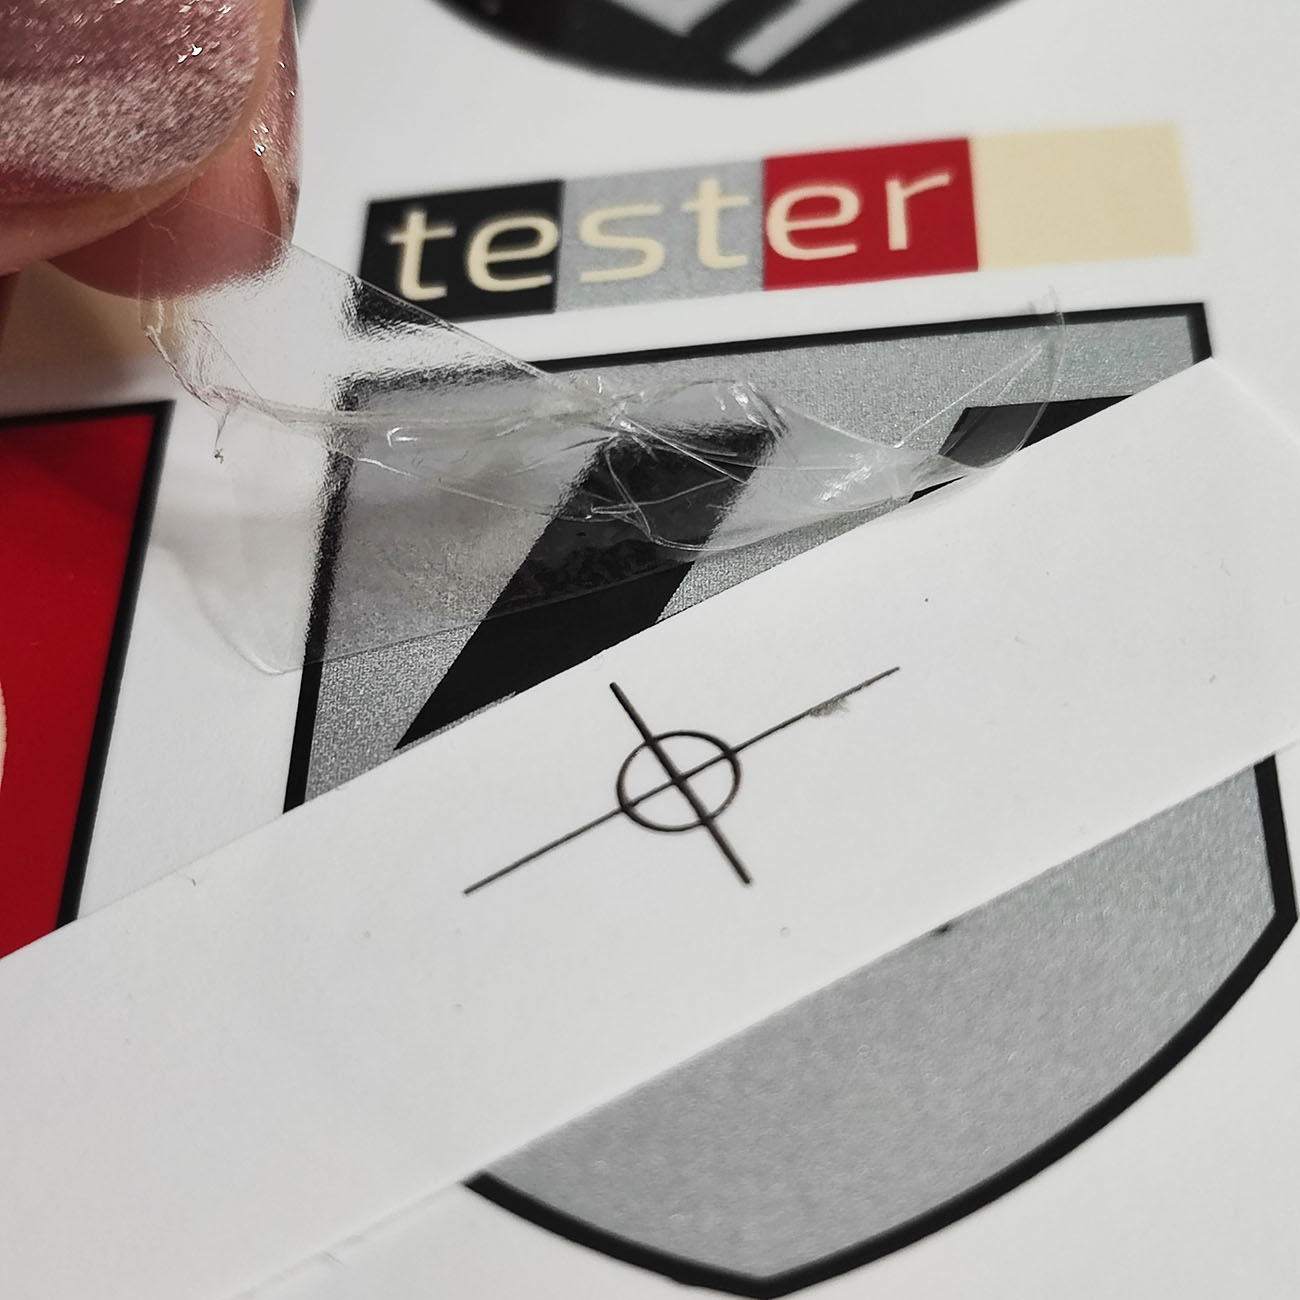
Together with each decal there is a strip-tester about 3x1 cm in size. In composition, it is exactly the same as the decal and is painted in all the main colors of the decal. Using it, try to work with the decal, see how the decal will sit on your surface, how it will look after drying. Try baking, the effect of varnish. Try to remove the top coat of varnish if you really want to.
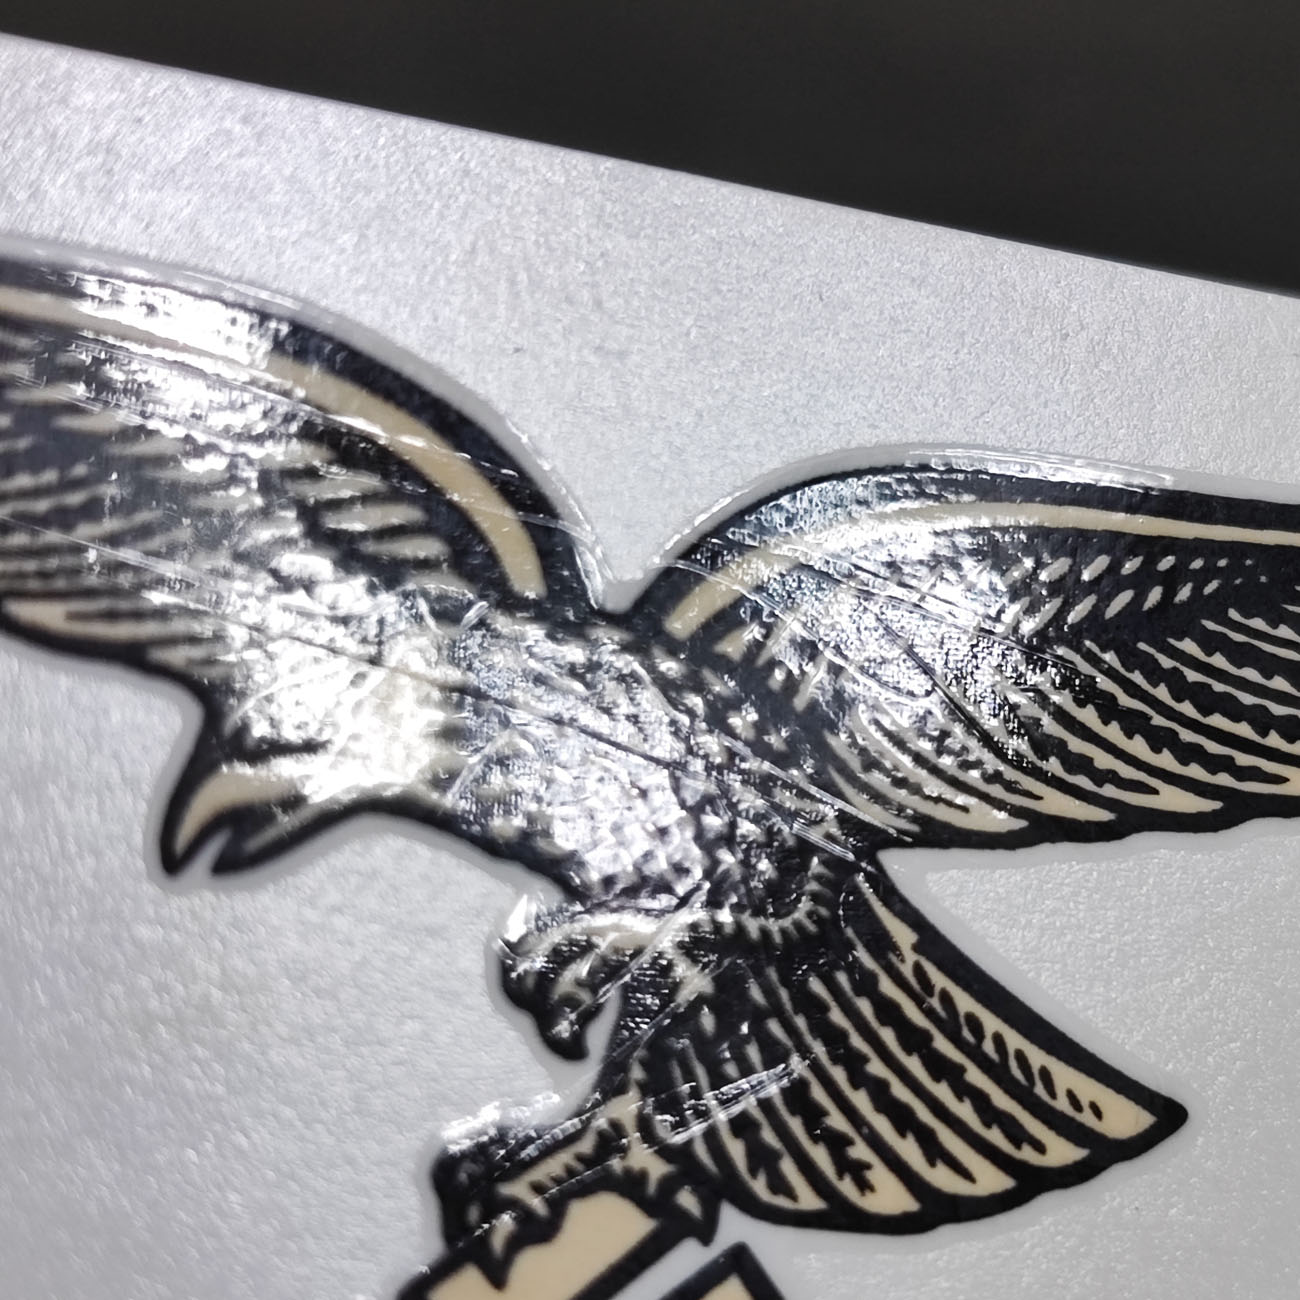
Why are there stripes on the varnish?
Decals can be supplied in a plastic film that protects the front part. It must be removed before work.
There are 2 layers of varnish on the decals. There may stripes on the upper one caused by storage (from plastic film). This is not considered a defect. When you transfer the decal to the rough surface of the helmet, these stripes will become invisible. If desired, the top layer of varnish can be removed (just scratch with your finger from the corner when decal is dry, the upper varnish will peel off like a film, the paint and another layer of varnish will remain). But in order for the decal to look authentic, we do not recommend removing the protective varnish layer (because it was quite thick on the originals), we recommend fixing the decal by "baking".
How to install the decal?
Put a piece of paper with the image (as it is, do not cut anything) in warm water for 30-60 seconds. After that, the decal must be put on the surface of the helmet and, holding the image with your finger, pull the paper base out. Set the pattern evenly, wet it with water if it sticks. You can pre-mark the surface of the helmet using a pencil, where the corners of the picture should be. Then remove the water from under the picture with a rag or toilet paper, holding the image with your fingers, so as not to move. Let it dry for at least a day. The decal will shrink to the surface.
How to fasten the decal?
The decal keeps perfectly by itself and does not require fastening. However, if you are going to wear a helmet during reenactment and make it wet in the rain, the decal must be additionally fixed.
1) A well-dried image can be varnished. Areas around the decal should be masked before varnishing. Varnish is sold as aerosol in stores for artists or motorists. Before applying the varnish, it is recommended to remove the upper protective film from the decal. On original helmets the lacquer over the decals was usually gloss and covered the decal area plus 1-2 mm from the edge.
2) Another way is called "baking". It may not give a good result from the first time (the decal may swell if there is air or water droplets under it), but if the result is successful, the decal holds so firmly that it can only be removed along with the paint. It literally melts into the paint and becomes one with it. To bake the decal, you need to heat the helmet in an oven (gas or electric, not microwave!) untill you can't normally touch it with your hand, but not more, so as not to burn the paint. Then turn off the heater and allow the helmet to cool down.
Historical reference.
This is an early version of the Luftwaffe helmet eagle. These were produced until 1937, found on M35 helmets from SE, Q and ET manufacturers.
You can read more about the history of this decal on the website germanhelmetvault.com


 -16%
-16%

![[on order] Assault badges assorted](https://reenact.store/image/cache/225ab03b6bd6d8acfe3e0081084b972d.JPG "[on order] Assault badges assorted")
![[on order] LfW qualification badges assorted](https://reenact.store/image/cache/c3b2110642906996060d994d28e971b0.JPG "[on order] LfW qualification badges assorted")


